"Take Paris back!"
A.R.L. 44 - Amusing Hobby 35A025
Design works for Char de Transition A.R.L 44, which was the full name of this tank, began during the Allied liberation of France in 1944. Basic project, dating back to the famous Char B1 was however severely outdated then. Equipped with captured German Maybach HL 230 engines (used in Panther and King Tiger tanks) and a good 90 mm gun, with 60 units produced they were nonetheless subpar to other tanks of their time and as such - their service time was very short...
But what if the course of WWII went differently and the ARL built earlier?
The year is 1946. Crew of a heavy tank, called „Irène” reached the outskirts of Paris. Many dents and holes on the armour indicate that they have seen a lot of action so far. But the upcoming battle will be decisive - it's the capital after all! Just to hide beside the railway track and wait and the enemy will appear eventually....
Thanks to the Amusing Hobby every modeller can now expand their collection with this interesting AFV. No doubt that the general recognition and popularity of this design is also due to inclusion on a famous online World of Tanks game - where it is featured among other constructions. I too fell under its spell and how did it turn out?
Read the article below!
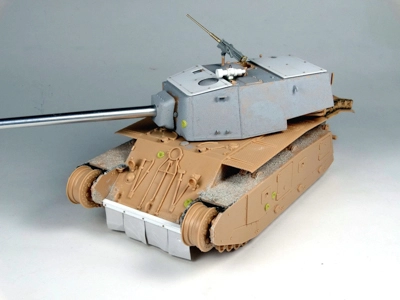
1) The kit goes together very well and all parts fit nicely. I added front skirts made out of 0,5 mm thick plastic card, additional turret top armour plates, night vision equipment, wooden log at the rear, M2 Browning MG and some shell impact marks which I massively corrected along the way because they seemed too rough.

2) Painting process bagan as usual with application of Vallejo surface primer and then highlighting the panels using Tamiya XF-80 acrylic paint.

3) I designed the camouflage pattern according to the ones used in the French Army at the beginning of WWII but modified it to have hard edges and acute angles between the colours. First to spray was a slightly lightened with white sand colour from AK RC palette, which was then masked using Tamiya Masking Tape.

4) Remaining colours were applied using paints from the same palette apart from the turret's roof where I used a grey Gunze C line colour.

5) To add some volume to the base colours I made a rendering using oil paints. I put small dots of various colours on the model's surface and the blended and feathered them using a brush moistened in odourless thinner.

6) I gave the surface some time to dry thoroughly and then I applied a coat of gloss varnish and placed the decals. It was the step when I also used a light green paint as a base for further chipping.

7) It was now time to make some pin wash. Since I first tried it, I definitely favour wash made by myself by thinning the proper oil paint than any ready made product for this technique. Here I used, always versatile, van Dyke Brown from van Gogh. brand.

8) Chipping areas painted with light green were filled using Sepia oil paint from 502 Abteilungpalette and I marked some rust marks on the fenders.

9) Weathering process on the side armour began with making some vertical streaking. I painted small lines and feathered them using a flat brush moistened in a thinner.

10) Rusted add-on armour plates were painted with my trusty Lifecolor Dust&Rust set and finished using a rusty wash from Ammo Mig.

11) Impact holes were firstly painted using black highly thinned enamel paint and then accented on the edges with a silver oil metalizer.

12) At this point I added the stowage that consisted of a fuel drum, some crates, towing cable and some balsa slats. Everything was coloured using Vallejo paints.

13) tracks were designed as a workable element, which made painting them much easier. After priming I washed them with a wash of appropriate colour, and added some spots in rust and beige hue…

…to finish them by tapping some dry pigments into them and finally drybrushing the edges with a metallic paint.

14) „Heavy” mud on the suspension was made by adding a thick layer of earthly coloured pigments and then soaking them using Tamiya acrylic thinner.

15) Small spots of splashes from Ammo Mig were sprinkled using a brush and toothpick technique. It made the overall dirt on the armour more realistic.

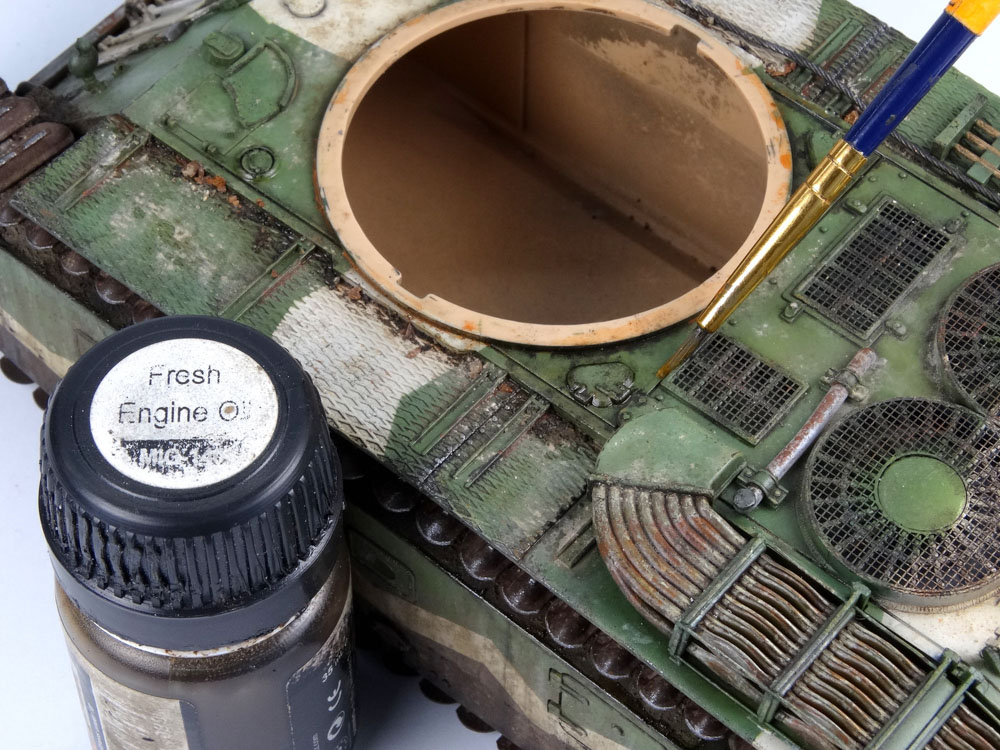
16) Oil lieaks and spills were made using Engine Grease oil paint.

17) I did a similar thing for the fuel stains and leaks, but here I used Fresh Engine Oil enamel.
18) I planned this AFV as a veteran of many fights, so it needed some spent cases. At this point the tank is more or less finished, but without some sort of a scenic base it's not exatly what I imagined...

19) The base and roadbed were cut from styrofoam onto which I applied tile glue with a spatula. When it was still wet I pressed on the railway track from the MiniArt set, some pebbles and soil from my garden. When this dried but was still soft I pressed in some track marks of our tank.

20) I sprayed the base using Tamiya acrylics.

21) I added some NOCH static grass, different plant fragments, small sticks etc. Everything was fixed using diluted PVA glue.

22) Distinct dark mark in the middle of the railway track was made by spraying Tamiya Smoke transparent paint.

23) Final piece to make was a fragment of traction post. I made it using some styrene profile and copper wires. Then I had only to fix the ARL to the base, add some crew figures and it was done! There was another nice and quite unique model kit in my collection!

You can view the completed ARL 44 in gallery!
Witek.

